
PWNagotchi Pt 2 Programming
- Cody
- Dec 14, 2024
- 5 min read
In part two of this series, I will discuss how I brought the PWNagotchi I built in part one to life. If you want to see how to build one of these neat hacking gadgets, check out part one. I found that my build and programming setup came from many different resources. Let’s discuss some background information on the PWNagotchi.
The PWNagotchi is designed to capture handshakes that are part of the WPA/WPA2 (WiFi protected access) protocols. These are four-way handshakes that occur when a device authenticates to an access point. These captured handshakes or “PWNed” networks save a PCAP (network packet capture) file that contains the hashed handshakes that may be able to be cracked offline using a tool such as HashCat. The hash, as far as I understand it, is a unique encryption key (Pairwise Transient Key (PTK)). The PWNagotchi isnt actually hacking networks, though you could gain access to a network if you cracked the hashed handshake. Unless it is your network or you have permission, that would be illegal. The PWNagotchi is capable of working on WPA and WPA2 protocols which are considered insecure.
The first thing we need is to be able to communicate with the Raspberry Pi Zero 2 W and eventually with the PWNagotchi.
For the PWNagotchi storage, I'm using:
SanDisk 128GB Ultra microSDXC UHS-I Memory Card (this is overkill but it is what I have)
Connecting to the PWNagotchi
Here is a list of cables and adapters that will enable us to interface with everything. It may not be necessary to have all of this. At a minimum, having the cables with an asterisk (*) will get you going. The HDMI to mini HDMI adapter helped me with troubleshooting, but I will talk about some key setup points that will make it unnecessary to have that adapter.
*Micro USB to USB A data cable (to connect to computer)
*USB C to USB A cable (to charge PiSugar battery pack)
HDMI to Mini HDMI adapter (to view PWNagotchi activity (useful for troubleshooting))
USB A female to micro USB male (if you want to connect to the PWNagotchi without having to use SSH from another computer; also useful for connecting a wireless keyboard and mouse)

For interacting with the PWNagotchi, we will primarily use the micro USB with data transfer port. But first we need to flash the PWNagotchi image to the micro SD card. For this, use the imager of your choice. I found that the Raspberry Pi Imager worked better for me. Others like the Balena Etcher. Install the micro SD card into a reader if you don't have a slot on your computer and then connect it via USB.

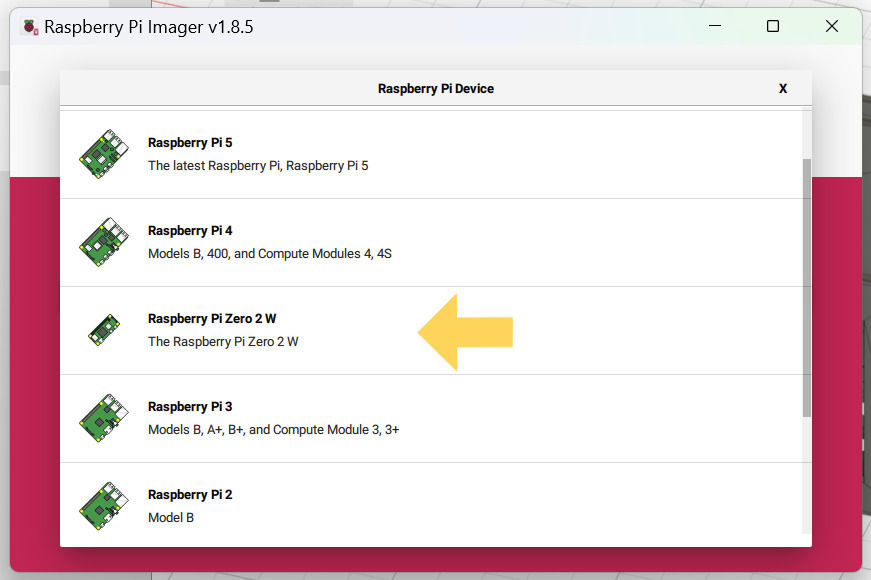
First we choose the Raspberry Pi Device. I'm using a Raspberry Pi Zero 2 W
Next we select the Operating System. Scroll to the bottom and select: "Use custom"

Then select the PWNagotchi image you want to use. I used the Jayofelony PWNagotchi variation as it is very user friendly to get up and going. The original creator of the PWNagotchi is no longer updating it. However, there is still plenty of useful information on those websites.


Then select your storage and click next and begin. When it is finished, you can install the micro SD card into the Raspberry Pi Zero 2 W and we can begin setting it up. Then you can connect the Raspberry Pi Zero 2 W to your regular computer via micro USB to USB A cord. Remember to connect to the micro USB port that allows data transfer on the Pi Zero and not the power only port. This is the micro USB port closest to the HDMI port.
Next, we need to set up the PWNagotchi to where we can use Secure Shell (SSH) on port 22 to interact with it. Open Device Manager (in Windows) and we want the PWNagotchi to show up as a network adapter and specifically, "USB Ethernet/RNDIS Gadget". To have it show up like this instead of as a USB Serial Device (COM3), there is a RNDIS driver you may need to download.

Refer to this link to find information on how to get the RNDIS driver and to update the device in device manager.
Next, open up "View Network Connections" and then we must modify the IPv4 properties for the RNDIS gadget (aka the PWNagotchi).


Then we update the properties as follows. IP address is 10.0.0.1 and the subnet mask is 255.255.255.0. Important note****: the DHCP server will change this to something else such as 192.168.#.#... Thus you may be able to connect to it once, but then you will receive connection time-outs. This was something I had to troubleshoot on my own as it was not mentioned in the resources I used to put this together. So, if your PWNagotchi shows up correctly in Network Connections and you receive connection time-outs when trying to SSH to it, check on the IPv4 properties and change it back to 10.0.0.1 and 255.255.255.0. Then tell it to stay.

Another important note, the resources I used to get started with the PWNagotchi mentioned that you should share your internet connection with the PWNagotchi as shown below. Ethernet 5, if you remember, is the RNDIS gadget which is the PWNagotchi (on my network). However, I found that doing that caused my laptop to get kicked off the internet over and over. When I turned it off, I was still able to SSH into the PWNagotchi and access the web UI, as long as I just connected the PWNagotchi to the computer using the micro USB to USB A cable. So my recommendation is to not share your internet with it, as the downsides are much higher than the potential upsides. It seems like it may have been an issue specific to Windows 11. Maybe you would have better luck with that on Windows 10. The next image shows the setup I just mentioned. Currently my setup has “Allow other network users to connect…” unchecked which stopped my problems.

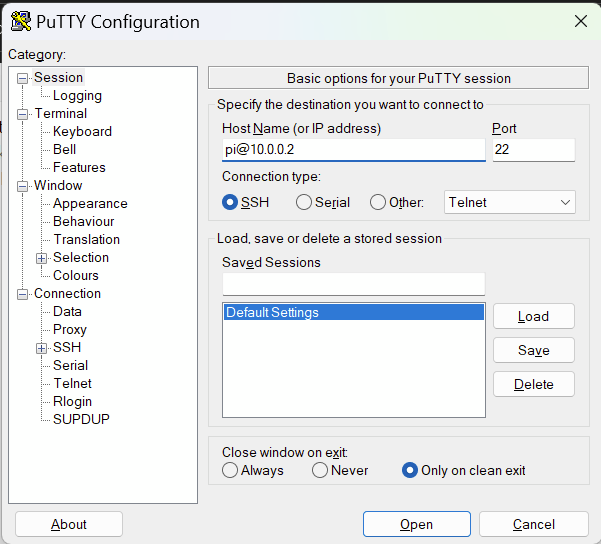
Now we can SSH to the PWNagotchi using whatever terminal you want to use. I'm using PuTTY. Simply:
ssh pi@10.0.0.2 on port 22.
Or in PowerShell, Bash, etc:
ssh pi@10.0.0.2
The default login information for the Raspberry Pi Zero 2 W is pi/raspberry. Be sure to change this when you log in.
The configuration changes that need to be made are located in the config.toml file and its located in the following path.
/etc/pwnagotchi/config.toml
To make changes:
sudo nano /etc/pwnagotchi/config.toml
The Jayofelony PWNagotchi image has a wizard which makes the initial setup simple.
sudo pwnagotchi --wizard
Some important configuration changes to make include:
Setting the name of your PWNagotchi
Whitelisting your home network SSID
Setting up bluetooth tethering to your phone to enable mobile cellphone UI access
Setting up the screen and its version: in my case, "waveshare_4"

At this point, the PWNagotchi should be functional and provide a cute face that changes depending on the WiFi conditions. There are many contributors to the PWNagotchi project that enable you to change the character, invert the display colors, change what information is displayed, etc.
Thanks for reading!


Comments